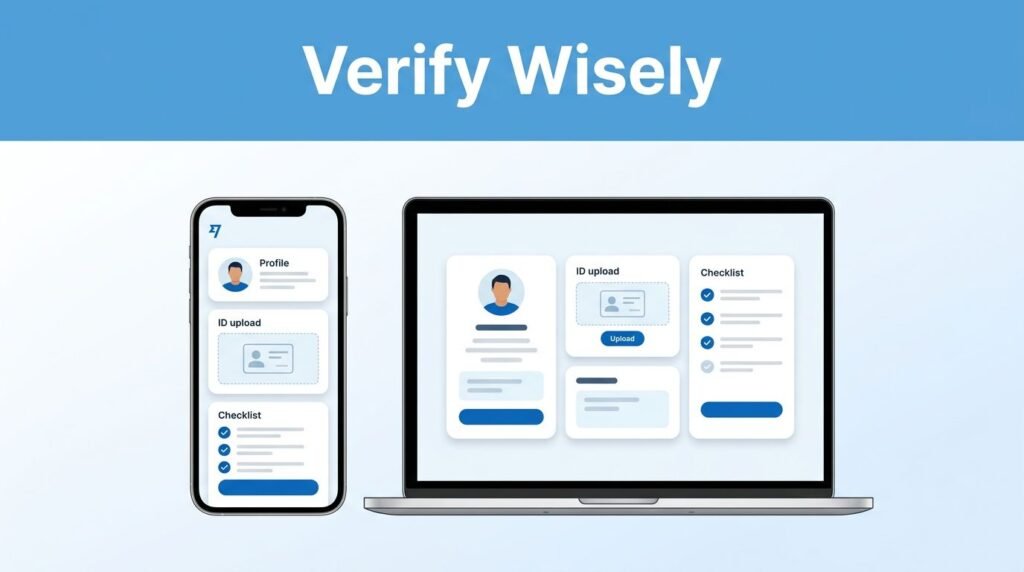
If you need to know how to verify Wise account details before you can use it, the main thing is simple: your profile information and your documents must match exactly. A name mismatch, blurry ID photo, or outdated address document can stop your Wise account verification before it starts.
This Wise account verification guide for US users explains where to start, which documents to prepare, and what to do if your identity check is rejected. These identity checks are required by financial regulations to ensure the safety of all users. The steps are similar in the Wise app and on the Wise website, though menu names can look a little different.
Key Takeaways
- Align your profile: Ensure your Wise profile information—including your full legal name, date of birth, and address—matches your government-issued ID exactly before starting the verification process.
- Prioritize image quality: When uploading ID documents, use well-lit, clear photos where all four corners of the document are visible and text is legible, avoiding glare or blurriness.
- Use current documentation: For proof of address, only submit documents dated within the last three months, and ensure the name and address on the document match your Wise account details.
- Follow prompt guidance: If asked for a selfie or video check, remove obstructions like hats or glasses and follow the app’s on-screen instructions to ensure your identity is captured correctly.
- Wait for confirmation: After submitting documents, monitor your email for a confirmation status or feedback, and avoid re-uploading the same files while a request is still pending.
Start With the Details on Your Wise Profile
Open the Wise mobile app or sign in through the Wise website. If you are still in the Wise account setup, opening, or registration stage, enter your legal name exactly as it appears on your government-issued ID. For US users, you will likely need to provide your social security number during this step. This process is similar if you are setting up a Wise Business account.
This part can confuse people because a small difference may matter. For example, do not leave out a middle name if it appears on your ID, use a nickname, or switch the order of your names. Your date of birth and home address should also be accurate before you begin the Wise identity verification process to ensure everything aligns with your documentation.
If you already have an account, go to your Profile or Account area. Look for an option such as Verify your identity, Verification, or an alert asking you to complete a check. Wise may ask for verification at different points, including when you want to send money, receive money, or use a specific account feature.
If you plan to receive funds held in Payoneer, use your verified local account details to send money from Payoneer to Wise.
The fastest way to avoid a rejected Wise ID verification is to make your account details match the documents before you upload anything.
People still sometimes search for TransferWise verification or TransferWise verify. Wise was formerly called TransferWise, but the identity check is handled in your current Wise account.
Upload a Valid ID That Is Easy to Read
When you select Verify your identity, Wise will ask you to choose and upload an accepted form of government-issued ID. While the specific options may vary based on your location and account type, the process commonly accepts the following forms of photo ID:
- A passport
- A driving licence
- A national ID card
These are the primary documents required to verify Wise account identity. Ensure you are using a current, valid document rather than an expired document or a simple photocopy.
Before you submit the image, check it as if you were handing it to someone across a desk. Every corner of the document should be fully visible. To ensure a clear photo, check that the text and your personal details are legible and free from glare caused by lamps, windows, or camera flashes.
A common mistake is taking the photo too quickly. If the text looks fuzzy when you zoom in, the automated system may struggle to read it. Place the document on a flat surface in a well-lit area, hold your phone steady, and take a new photo if any part of the image appears blurred.

## Complete the Selfie or Video Check
After your document upload, Wise may ask you to complete a selfie or video verification to confirm your identity. This process helps ensure that the person opening the account matches the individual shown on the uploaded document, and in some cases, you may be asked to take a selfie with ID.
Follow the on-screen prompts and ensure you are in a well-lit room. Face the light source instead of sitting with a bright window directly behind you. Remove hats, sunglasses, or regular glasses if they obscure your features or create reflections that interfere with the scan.
The app may ask you to move your head, center your face, or hold still for a few seconds. This is a standard part of the process. Take your time, and avoid attempting to complete the check while walking, driving, or in a dim environment.
Wise identity verification is a vital security measure, not a test you can fail simply because you look different than you do in your official photo. If an issue arises, it is usually due to poor lighting, an obscured face, or a camera that cannot properly focus.
Submit Proof of Address if Wise Requests It
Not every account gets asked for proof of address, but you may see this request during Wise KYC. As a financial institution, Wise must comply with global regulations to prevent money laundering, which is why they perform these identity checks to confirm customer details. If Wise asks for a proof of address, upload a document dated within the last three months.
For proof of address, Wise may request documents such as:
- A bank statement
- A utility bill
Your name and address need to match the details in your Wise profile. Check the document before uploading it. If you recently moved and your profile shows a new address while your bank statement has your old one, the document may not work for this step.
Providing a proof of address is separate from your ID. A driver’s license may prove your identity, but Wise can still ask for a recent document that shows where you live. If you are unsure which document to use, look at the request shown in your account and submit only the type of document it asks for.
Submit Your Documents and Watch for the Email
Once your ID, selfie or video, and any proof of address documents are attached, take a final moment to review everything before you upload documents to complete your submission. Make sure your internet connection is stable before hitting send, especially if you are recording a video.
So, how long does Wise take to verify identity? It often takes a few hours, but it can take up to 2-3 working days when additional checks are needed. Keep an eye on the email address connected to your Wise account because Wise will send a confirmation or explain if it needs something else.
You can also sign back in and check your Profile or Account section. If you are wondering how to know if your Wise account is verified, look for a completed verification status there or check for the confirmation email from Wise. Do not keep submitting the same documents repeatedly while the first request is still under review, unless Wise tells you to do so.
Verification may be needed before you can fully use certain Wise services. If your goal is to verify a Wise account to receive money, complete the check as early as possible instead of waiting until you need to receive a payment. Once verified, you can easily link your personal bank account to your profile and start to send money globally with confidence.
What to Do if Wise Rejects Your Verification
A rejected identity verification does not mean you cannot use Wise. It usually means Wise could not confirm something in the documents or images you submitted, which is a necessary step to maintain high levels of account security.
Read the rejection reason before you upload anything again. If the message mentions image quality, take a clear photo in better light and make sure all four corners are visible. If it mentions a mismatch, compare the spelling of your name, date of birth, and address against your Wise profile.
Do not edit, crop heavily, or add filters to a document image. A clean original photo is the better choice. For an address document, check the date first. A valid-looking utility bill can still be rejected if it is older than three months.
If you are looking up how to get verified in a Wise account after a failed attempt, focus on the reason Wise gave you. Re-uploading the same blurry photo or an outdated photo ID will likely lead to the same result.
Frequently Asked Questions
How long does Wise account verification take?
Typically, the verification process is completed within a few hours, though it can take up to 2-3 working days in some cases. You will receive an email notification once your documents have been reviewed and your account is verified.
Can I use my old TransferWise login to verify my account?
Yes, if you previously had a TransferWise account, your login credentials remain the same. You can use your existing Wise credentials to access your profile and complete any pending identity verification requirements.
Why was my Wise verification rejected?
Verification is most often rejected due to poor image quality, such as blurry text or glare, or because the information on the document does not exactly match your Wise profile. Read the rejection email carefully to understand the specific reason, and ensure you submit a clearer or corrected document accordingly.
Do I need to provide proof of address for every account?
Not every user is required to provide proof of address during the initial verification process. Wise will specifically request this documentation through your account dashboard if it is necessary for your particular account setup.
Prefer Visual Help? Watch the Step-by-Step Video Guide!
Struggling with How to Verify Wise Account? This video visually walks you through the steps so you can follow along more easily.
Watch TutorialKeep Your Wise Account Details Consistent
Your Wise account verification process goes more smoothly when your profile and documents tell the same story. Use your legal name, submit clear images, complete the selfie check in good light, and provide recent proof of address only if requested.
The waiting part can feel frustrating, especially if you need to send money soon. Still, a careful review before you submit is usually faster than fixing a rejection after the fact.