If you want to learn how to remove background noise in Google Meet, start with the built-in noise cancellation setting, then verify which microphone Google Meet is using. That combination handles most typing, fan noise, nearby conversations, and outside sounds before they distract everyone in your virtual meetings.
Noise cancellation helps, but it cannot fully fix a poor microphone, a loud room, or an overloaded computer. Set up your audio before the meeting starts so you are not trying to troubleshoot your Google Meet settings while people are waiting.
Key Takeaways
- Enable the built-in noise cancellation feature in the Audio settings tab to automatically filter out common sounds like keyboard typing and mouse clicks.
- Always verify that Google Meet is using your preferred microphone, as the platform may default to lower-quality laptop hardware even when a professional headset is connected.
- Improve audio quality by physically optimizing your workspace, such as closing doors and moving away from noisy appliances, to assist the software in isolating your voice.
- Prevent system-related audio distortion by closing unnecessary browser tabs and resource-heavy applications before joining your meeting.
- Conduct a quick test call before important sessions to ensure your hardware is configured correctly and your audio is clear to other participants.
Turn on noise cancellation
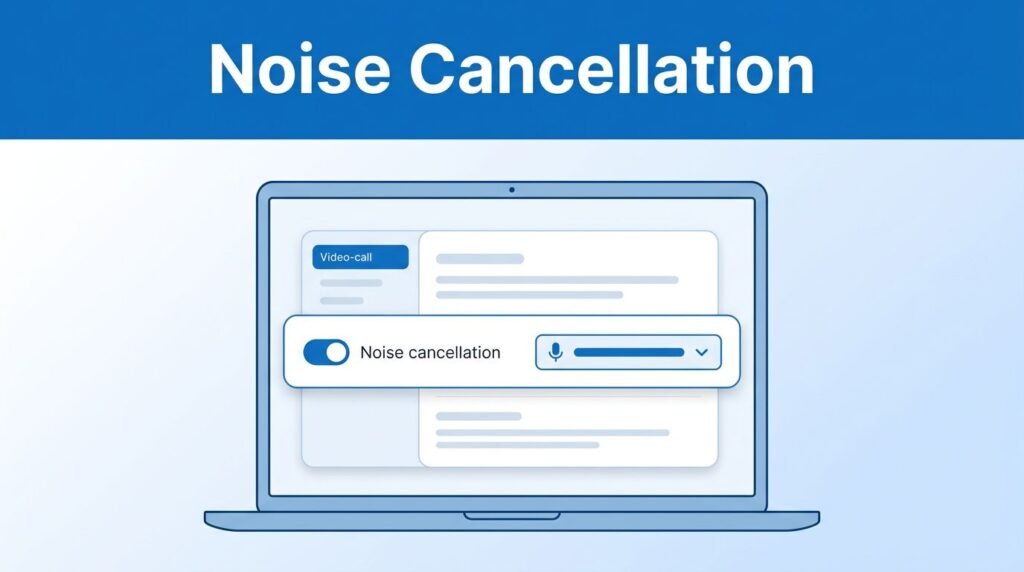
To effectively remove background noise in Google Meet, join or start your meeting first. Note that this feature is typically available for specific premium Google Workspace accounts. Before you begin speaking, look for the three-dot menu in the bottom-right corner of the meeting screen.
- Click or tap the three-dot menu.
- Select Settings.
- Open the Audio tab.
- Find noise cancellation and turn it on.
Google Meet will then work to filter out noise, such as keyboard typing, mouse clicks, paper shuffling, and common environmental sounds. This is the primary setting to use when you want to reduce background noise in Google Meet without changing your entire hardware setup.
Noise cancellation reduces steady, unwanted sounds. It may not remove loud talking close to your microphone, music, or a TV playing in the same room.
Does Google Meet remove background noise completely? No. It helps filter out noise for a more professional experience, but your microphone will still pick up sounds that are louder than your voice or placed too close to the hardware.
If you do not see the noise cancellation option, your account type, device, app version, or meeting configuration may not support it. Menu names can also look slightly different between the browser version and the mobile app.
Choose the Microphone Google Meet Should Use
A laptop’s built-in microphone is often the reason your Google Meet sound quality is poor. It usually sits farther away from you, so it catches keyboard noise, room echo, and every sound bouncing around your desk. To improve your overall experience, ensure you have correctly configured both your microphone and speaker settings within the platform.
Stay in Settings > Audio and look for the microphone or input device list. If you have a USB microphone, wired headset, earbuds with a mic, or webcam microphone connected, choose that device instead of leaving the setting on the wrong default input.
This part can confuse people because Google Meet may select a camera mic or laptop mic even when your better microphone is plugged in. Speak a few words after selecting the device and watch for the input indicator, if one appears, to confirm Meet is hearing the right mic.
An external mic does not have to be expensive. The important part is placing it close enough to your mouth that it hears you clearly without turning up every sound in the room. By upgrading your hardware and selecting the correct input, you will achieve professional audio clarity during every session.
Reduce Noise Around Your Desk
Software can only do so much. If you want to know how to stop background noise in Google Meet, the fastest improvement may be moving to a quieter spot before your video meeting begins.
Close the door if you can, move away from open windows, and keep your microphone pointed away from noisy appliances. A fan, air conditioner, barking dog, or TV can be hard for any filter to remove if it is right beside you.
A few small changes can help with echo and remove background sounds:
- Use a room with curtains, rugs, furniture, or other soft surfaces instead of an empty room with hard walls.
- Keep your microphone close to you and away from your keyboard.
- Silence notifications on your phone and computer before joining.
- Ask people nearby to lower their voices during an important meeting.
Headphones with a microphone are especially useful. They stop your computer speakers from feeding sound back into the microphone, which helps if you have a Google Meet echo problem or people say your call is echoing.
Close Apps That Can Affect Google Meet Audio
If audio crackles, cuts out, or falls behind your video, background noise may not be the only issue. Too many browser tabs, resource-heavy Chrome extension tools, or extensions specifically designed for Google Meet can put your computer under pressure, which often negatively impacts your call quality.
Before joining your meeting, close anything you do not need. Video editors, games, screen-recording software, large downloads, and extra browser windows can all make Google Meet work harder than it should.
This is also worth checking when your audio settings appear correct but your Google Meet audio is not working as expected. A system overload can make audio stutter or sound distorted, which may feel like a microphone problem when it is really a performance issue.
If you are using the platform in a browser, refresh the page after closing extra tabs. If you are using the app, close it fully and reopen it. On mobile, close other apps that may be using your microphone or consuming significant battery and processing power.
Fix Static, Echo, and No Sound in Google Meet
Static and echo often require different troubleshooting methods. Static usually stems from a loose cable, a poor microphone connection, or a struggling device, while echo is an audio feedback loop that requires proper echo cancellation to resolve. If you are struggling with audio feedback, try these steps in order:
- Put on headphones or lower your speaker volume.
- Check that only one microphone is active near you.
- Observe the active speaker indicators in the meeting to identify who might be causing the echo, and ask them to mute when they are not speaking.
- Move your microphone farther away from your speakers.
- Leave and rejoin the call after changing your audio device.
If you have Google Meet no audio, Google Meet speaker not working, or Google Meet sound not working issues, open Settings > Audio and verify your microphone and speaker settings to ensure the correct hardware is selected and synchronized. Your sound might be playing through headphones, a monitor, or another device you are not currently using.
For a Google Meet no sound issue, also check your device volume and make sure the meeting tab or app is not muted. If an external microphone still produces static, unplug it, reconnect it, and check the cable or USB port for damage.
Test Your Audio Before the Real Meeting
A short test call can save you from joining an interview, presentation, or class with poor audio. Open a meeting early, speak at your normal volume, and listen for echo, static, keyboard noise, or a voice that sounds too quiet.
If someone can help, ask them for a quick sound check. They can tell you if your voice is clear from the other side, which matters more than how it sounds in the room.
For mobile users, the same basics apply. Join the meeting, open the available meeting settings, and look for audio controls, noise cancellation, or noise suppression features. The layout may differ on iPhone and Android, but you should still check the selected microphone, use headphones when possible, and keep the app updated.
Updates can improve how Google Meet handles audio and background interference. Google is constantly using AI-driven technology to enhance the way audio is processed during virtual meetings. If you are trying to improve sound quality in Google Meet and your audio settings look different than expected, update your browser or the Google Meet app first.
Frequently Asked Questions
Can I use noise cancellation on every Google Meet account?
No, noise cancellation is typically reserved for specific premium Google Workspace accounts. If you do not see the option in your Audio settings, your current account tier or meeting configuration may not support this feature.
Why do I still hear background noise after turning on noise cancellation?
Google Meet’s noise cancellation is designed to filter out steady, background sounds rather than sudden, loud noises. Sounds like a TV playing nearby or a person speaking directly next to your microphone will likely still be picked up by the system.
What should I do if my audio sounds distorted or crackly?
Distorted audio is often caused by system strain rather than a microphone issue. Try closing unnecessary browser tabs, pausing large downloads, and ensuring your computer is not running resource-heavy applications in the background.
How can I stop a distracting echo during my meeting?
Echo is usually caused by an audio feedback loop between your speakers and microphone. To fix this, use a headset to isolate your audio, move your microphone further away from your speakers, or lower your overall speaker volume.
Prefer Visual Help? Watch the Step-by-Step Video Guide!
Struggling with How to Fix Audio Noise in Google Meet? This video visually walks you through the steps so you can follow along more easily.
Watch TutorialClearer Calls Start Before You Join
The most effective way to achieve professional voice isolation during your sessions is to turn on noise cancellation, select the correct input device, and minimize background noise in your workspace before the call begins. If your audio quality remains inconsistent, using a dedicated headset and performing a quick device check will typically make the biggest difference in clarity.
Producing a clear voice does not require a perfect studio setup. Instead, it relies on maintaining a quiet space, using the right microphone, and taking a few minutes to verify your settings. By following these steps, you can ensure that every session you host or join on Google Meet is crisp, professional, and free of distractions.
Want To Learn How to Change Voice in Google Meet in Real Time. Here’s a Step-by-Step Guide Article on how to do so.