If you are looking for how to increase video quality in Premiere Pro, the fastest built-in method is to apply sharpening effects to an adjustment layer over your edit in Adobe Premiere Pro. This technique provides a cleaner, crisper look across your entire project without the need to apply effects to every individual clip one by one.
This workflow works best when your footage already looks decent but feels a little soft. While these adjustments can improve video quality in Premiere Pro and make edges look clearer, keep in mind that this method will not turn low-quality footage into true high-resolution video on its own.
Here is the setup that gives you the result shown in the tutorial.
Key Takeaways
- Use Adjustment Layers: Apply sharpening effects to an adjustment layer above your clips to efficiently enhance an entire sequence without editing each clip individually.
- Combine Sharpening Tools: Use the ‘Sharpen’ and ‘Unsharp Mask’ effects together to define edges and add perceived detail to soft-looking footage.
- Avoid Over-Sharpening: Excessive application of these effects can introduce artifacts like glowing halos or crunchy skin textures, so dial back the values if the image looks artificial.
- Manage Expectations: Sharpening enhances existing detail but cannot create new data; it is not a substitute for high-quality source footage or true resolution upscaling.
- Check Export Settings: Final image quality relies heavily on your export settings; ensure your bitrate and resolution are optimized to prevent your sharp edit from being softened by compression.
What this method improves, and what it doesn’t
If your main problem is soft-looking footage, this is a great place to start. You are using two built-in effects, Sharpen and Unsharp Mask, on a single adjustment layer, which makes this one of the most efficient ways to adjust Adobe Premiere Pro video quality settings across an entire sequence.
This is a practical approach to improving your video editing workflow without relying on third-party plugins. You do not have to open every individual clip and repeat the same steps manually.
It is important to understand that this method does not create image detail that was never captured in the first place. If your goal is to fix low quality video, change the video resolution, or upscale video to a higher dimension, those are separate technical challenges. While sharpening can improve video clarity in Premiere Pro, it cannot magically rebuild missing data from a blurry or heavily compressed source file.
Sharpening makes footage look clearer. It does not add real detail the camera never captured.
That is the most important thing to know before you start. If you want to know how to make video quality better in Premiere Pro, this method helps the image look more defined. This is often enough to create a professional look for YouTube videos, social media content, tutorials, and other screen-based edits.
Create one adjustment layer for the whole edit
The cleanest way to improve your footage is with an adjustment layer. In Adobe Premiere Pro, this feature allows you to place effects over multiple clips at once, saving you the time of editing each segment separately.
Follow these steps:
- Open your project and locate the Project panel.
- Right-click in an empty area inside that panel.
- Choose New Item.
- Click Adjustment Layer, then click OK. When the settings box appears, ensure the adjustment layer matches your sequence settings to maintain consistency throughout your edit.
- Drag that adjustment layer onto your timeline and place it above the clips you want to affect.
Once it is on the timeline, stretch it so it covers the full length of your edit. If you want the whole video to have the same look, let the adjustment layer run across the entire sequence.
This part can confuse people because the layer does not change anything by itself. It is only there to hold the effects. The clips under it remain your original footage, but anything applied to the adjustment layer will automatically modify every clip positioned below it.
If you can’t create the adjustment layer
If you do not see enough empty space in the Project panel to right-click, the panel may be too small or crowded. Try expanding it first.
You can also use the New Item button at the bottom of the Project panel in Adobe Premiere Pro and choose Adjustment Layer from there. It is the same result, just a different path.
If your goal is to learn how to improve video quality in Premiere Pro across a full timeline, using an adjustment layer is the essential step that makes the rest of the process easy.
Apply Sharpen and Unsharp Mask
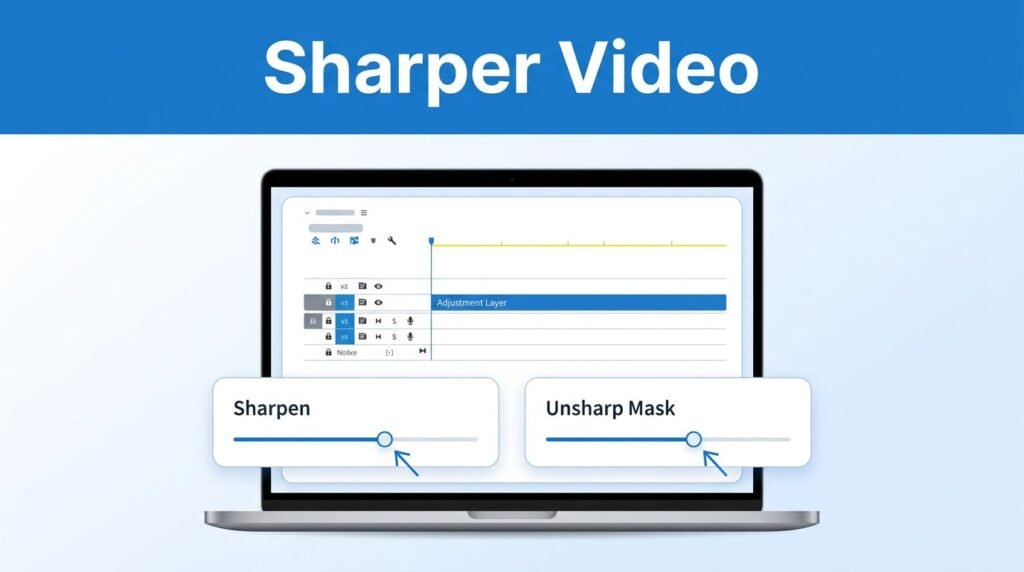
Now navigate to the Effects panel. Use the search box to find the sharpen effect, then drag it onto your adjustment layer in the timeline.
After that, open the effect controls panel for the adjustment layer. Locate the sharpen effect and set the sharpen amount to 10.
Next, search for the unsharp mask in the Effects panel and drag that onto the same adjustment layer. With the unsharp mask applied, set its Amount to 100.
These are the exact values from the tutorial:
That combination is what gives the footage a more polished look. The standard sharpen effect helps define edges, while the unsharp mask adds stronger perceived detail. Together, they can improve Adobe Premiere Pro video quality in a quick, simple way.
A common mistake is pushing either effect too far. More is not always better. If you overdo it, skin can look rough, outlines can glow, and fine textures can start to look fake. If the image starts to look crunchy or you notice halos around edges, lower the values or experiment with the radius settings within the unsharp mask to smooth out the transition.
If the image starts to look crunchy or you notice halos around edges, lower the values a bit.
If you want to compare the result, toggle the effect visibility in the effect controls panel and check the before and after. On decent footage, the change is usually easy to spot.
When this works best, and when it won’t
This sharpening method works best on footage that is already fairly clean. If your clip is filled with heavy noise and artifacts, sharpening can make those problems more distracting instead of hiding them. High quality footage responds well to these adjustments, but poor source material usually requires dedicated denoising tools first.
It is important to understand that this is not a true upscale video process. Simply using “scale to frame size” or “set to frame size” to force 1080p clips into a 4K resolution sequence does not actually add detail; it just stretches the pixels. If you are struggling with image clarity, keep in mind that this sharpening trick is not a substitute for proper resolution or high-bitrate acquisition. If your file looks muddy after export, your Premiere Pro quality settings at export may be part of the problem.
The upside is that this technique helps significantly on platforms where crisp edges matter. Tutorial videos, talking-head clips, gaming commentary, and short-form social posts often benefit from a little extra sharpness because the image must read well on both mobile devices and desktops.
If you are polishing an explainer or tutorial after cleaning up the footage, you may also want to create a typewriter effect in Premiere Pro so your on-screen text matches the sharper look.
If playback slows down after adding these effects, you can temporarily disable them while editing. Just remember to turn them back on before you export your final project.
Don’t let export settings soften the result
The sharpening happens in your timeline, but your export settings still dictate the final outcome. If you choose weak export settings, you can lose the clarity you just added during your video editing workflow.
If you are searching for the best export settings for Premiere Pro or looking for advice on how to export high quality video in Premiere Pro, the core principle remains the same: do not expect the export process to rescue soft footage, and do not let aggressive compression crush a cleaner image. Your Adobe Premiere Pro render quality, bitrate, and output resolution are vital factors in the final look.
This is where many creators mix up a few different ideas. A sharper timeline is only one piece of the puzzle. Achieving a Premiere Pro high-quality export requires attention to detail. If you lower the bitrate too much, the final file can look soft or compressed, even if the image looked crisp in the Program Monitor. Before you finalize your project, verify that your frame rate matches your sequence and that your export settings are optimized for your target platform.
To take your video editing to the next level, do not rely on sharpening alone. You should also check the Lumetri Color panel to perform color correction and enhance video color. Combining these tools with your sharpening effect will provide a more polished, professional look.
If you want a broader look at built-in tools beyond sharpening, Adobe has a helpful video enhancement overview for Premiere. It is useful if you are comparing sharpen effects with color and clarity tools.
For most beginners, the best Premiere Pro quality settings start with a clean sequence. By managing your render settings early and exporting at a resolution that matches your project, you ensure the highest quality results without needing to fix issues at the last step.
Frequently Asked Questions
Can this method fix blurry or out-of-focus footage?
No, sharpening effects only enhance the edges and contrast of existing pixels. They cannot reconstruct actual image detail that was never captured, meaning they are best used on footage that is slightly soft rather than completely out of focus.
Does applying these effects slow down my computer?
Yes, adding multiple effects to an adjustment layer can increase the processing load on your machine. If your playback becomes choppy, you can temporarily toggle the effect visibility off in the Effect Controls panel while you continue editing.
Can I use this for 4K footage?
Absolutely, you can use these sharpening settings on 4K footage to give it a crisper look for web display. However, be cautious with the intensity, as high-resolution files often have more natural detail and can look overly artificial if the sharpen values are set too high.
Should I sharpen my footage before or after color grading?
It is generally best to perform your sharpening toward the end of your workflow, after your color correction is finalized. Applying sharpening early can sometimes make it harder to judge subtle color adjustments or introduce noise that becomes more prominent once the image is graded.
Prefer Visual Help? Watch the Step-by-Step Video Guide!
Struggling with How To Increase Video Quality in Premiere Pro? This video walks you through the process step by step with clear, hands-on instructions, making it easy to follow along as you improve your video’s quality.
Watch TutorialA quick way to make footage look better
If you are looking for a straightforward way to learn how to increase video quality in Premiere Pro without relying on external plugins, this technique is a reliable first move. Simply create an adjustment layer, apply the Sharpen effect set to 10, and layer on Unsharp Mask at 100.
This approach is fast and effective for applying a consistent look across an entire edit. Keep in mind that while this method can sharpen soft footage, it is not a replacement for high quality source material or proper export settings. If your project requires reaching a specific target resolution or you need to fix heavy artifacting, you might consider professional third party tools. For more advanced results, integrating an AI video upscaler or utilizing powerful plugins like Boris FX can provide the extra depth needed for high end production.
Want To Learn How to Upscale Video to 4K in Premiere Pro. Here’s a Step-by-Step Guide Article on how to do so.